
“But if we receive them in the mail, why should I learn how to download telecoms bills from online?”
A reliable and secure internet connection is vital in this day and age, especially when considering the amount of employees who have opted to switch to a remote (i.e., work-from-home) basis. Even traditional (i.e., office) workers love to kick their feet on the couch and watch their favourite Netflix show after a long and hard day.
For these reasons, landlords must provide tenants with high-speed internet throughout their stay. However, when landlords own or oversee several properties across the Maltese Islands, keeping track of bills and usage habits in each dwelling may be challenging. Landlords must coordinate with tenants to collect bills arriving by mail or they may be misplaced.
This is why accessing telecoms bills from anywhere is the best option for busy landlords and home owners. Melita provides its clients with the ability to view and download telecoms bills using their MyMelita account. In this article, we’ll provide a detailed walk-through of how landlords can access their bills online from anywhere.
How to download telecoms bills using MyMelita
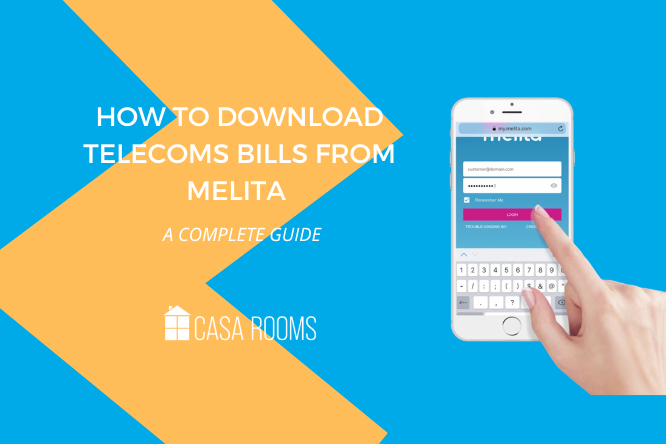
Step 1: Access MyMelita
The first step involves accessing the online portal. Melita clients can download the MyMelita application on their mobile phones using the Google Play store or Apple’s App Store. Otherwise, users can access MyMelita through the webportal by visiting the following link.
Step 2: Register or Login to the Portal
If the clients already have a MyMelita account, then all they need to do is simply login using their credentials. Otherwise, after accessing the portal, either through the application or web browser, users must create an account. Simply click on ‘Create Account’ to begin the registration process.

New users should click on ‘CREATE ACCOUNT‘ to begin the registration process.
The registration process consists of four steps:
- Enter an email address to be associated with the account.
- Select a registration method. This can either be ‘via Mobile Number’ (relevant for clients that already have a Melita mobile subscription associated with their mobile phones), or ‘via Bill Details.’ For the second option, clients will need to enter their information from their previous bills including the ‘Invoice/Statement Number’ and ‘Invoice Total’ amount from the last issued bill.
- Verify the account using a verification PIN sent to the email address entered in the first step. Simply login to your mailbox and find the email from MyMelita.
- Activate the account by following the instructions in the email. This should include a link that will redirect you to the MyMelita platform.
- Select a strong password to be associated with the account. Try choosing one that’s difficult for scammers to reach but also one that is memorable.
- Choose a security question and write the answer in the box below.
- Complete the registration by selecting ‘Complete and Login.’
Step 3: Select a billing method
If the client already has a MyMelita account, this step isn’t necessary since they would’ve done this step during the registration process.
In the case of new users, they must select a billing method, i.e., by post and/or via email. It’s important to note that the postal billing method comes at an extra cost of €1.50/month.
Step 4: Set up bill payments
New users of the MyMelita portal must also select their payment method after registration. In this step, users first need to select their bank name from a drop-down menu. They are then required to enter their IBAN or Account Number. The account needs to be validated (select ‘Validate Account’) to proceed.
Step 5: Select ‘My Bills’ from the main menu
After completing the registration, users can access the main menu for the MyMelita platform. To access previous statements, select ‘My Bills.’ On this page, users can view all their previous invoices under ‘Billing History.’

Users can view their bills by selecting ‘My Bills’ on the MyMelita homepage.
Step 6: Download previous bills
Under the ‘Billing History’ heading, users can view invoices from the past six months associated with their account. Downloading the invoices is simple as users simply need to select the download icon (downward arrow symbol). Afterwards, a file including the selected invoice will save to the respective Download folder on the device.

To download telecoms bills, users simply need to click on the download icon near their required invoice.

There it is! The statement save to the device.
That’s all there is to it!
Melita designed an easy-to-use platform, available both on mobile and desktop devices to simplify their clients’ day-to-day service requirements. Besides downloading bills, users can also view the online store and their registered services, top-up their accounts, access customer support, and terminate or suspend their account.
As proeprty managers, we understand the difficulties associated with being a landlord and handling bills for seperate dwellings. Therefore, we hope this guide was useful and eases the struggles associated with managing several properties across the islands.
Get in touch with us for more information on how our property management services increase your property’s value! Remember to follow us on Facebook to keep updated with our latest updates and guides.


Working at Walmart
Thanks